Generative Fill is a powerful tool for creating composites, especially when it comes to combining two very different images together. The feature is available in Photoshop Beta at the time of writing. And Photoshop users are running the beta version in record numbers to access Generative Fill because of the ways that it can help with editing and creative workflows.
In this tutorial, we'll show you how to use Generative Fill to combine two images. We'll be using two vertical images of two very different geological landscapes. But this workflow will work for many kinds of images, and you can use more than two. Let's get started!
Set Up the Canvas and Image Placement
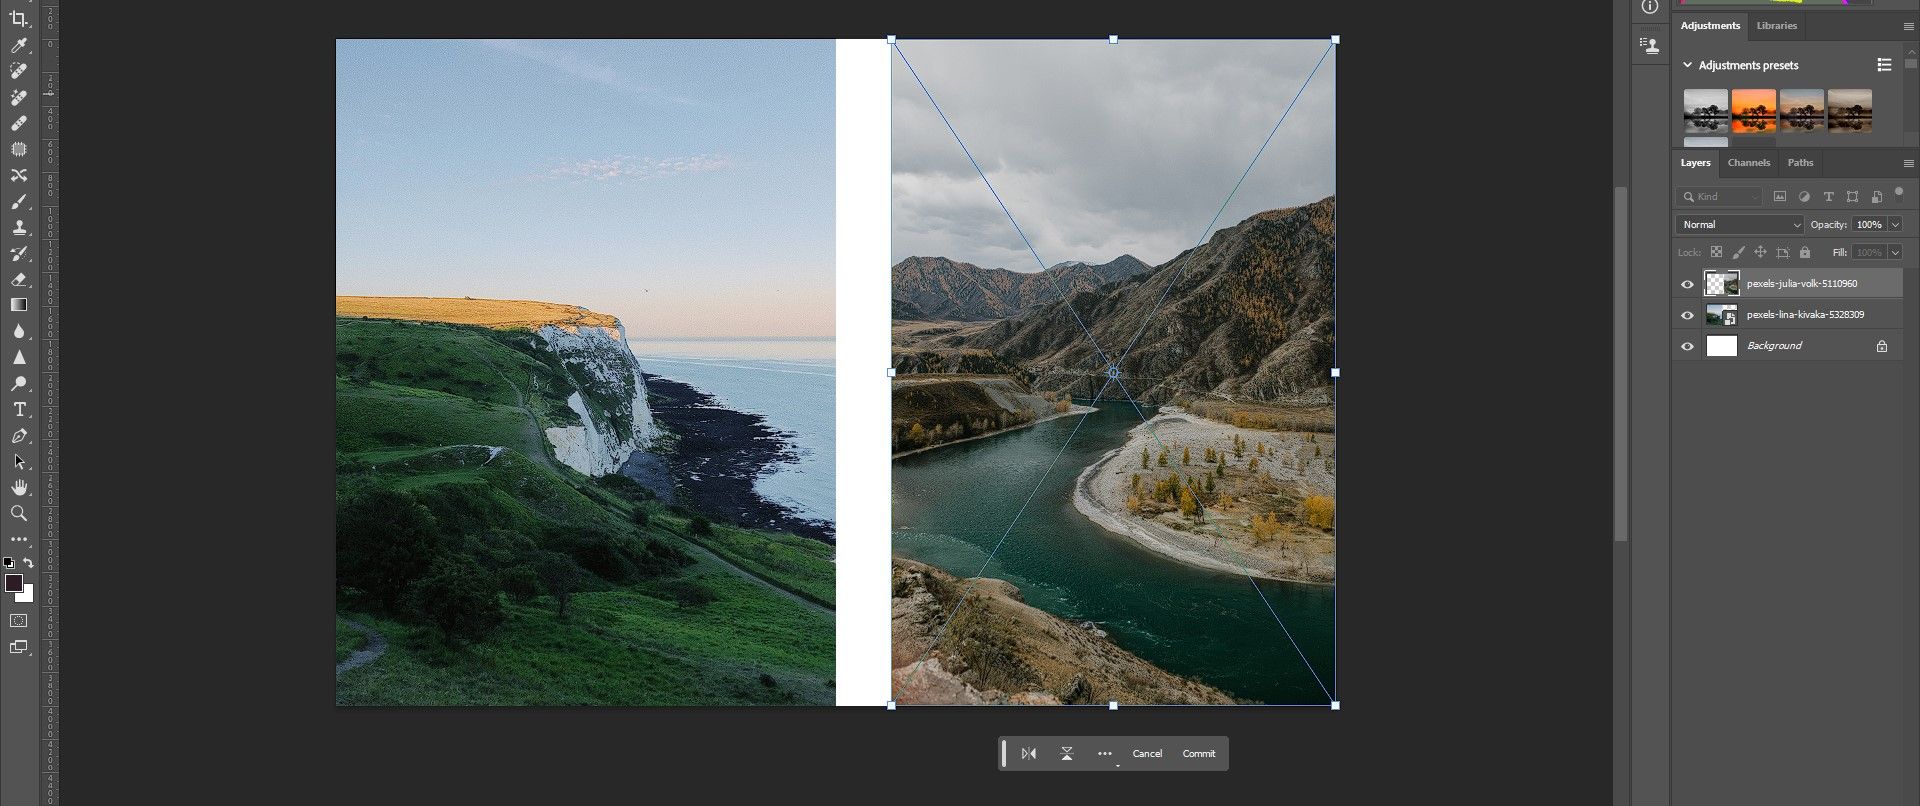
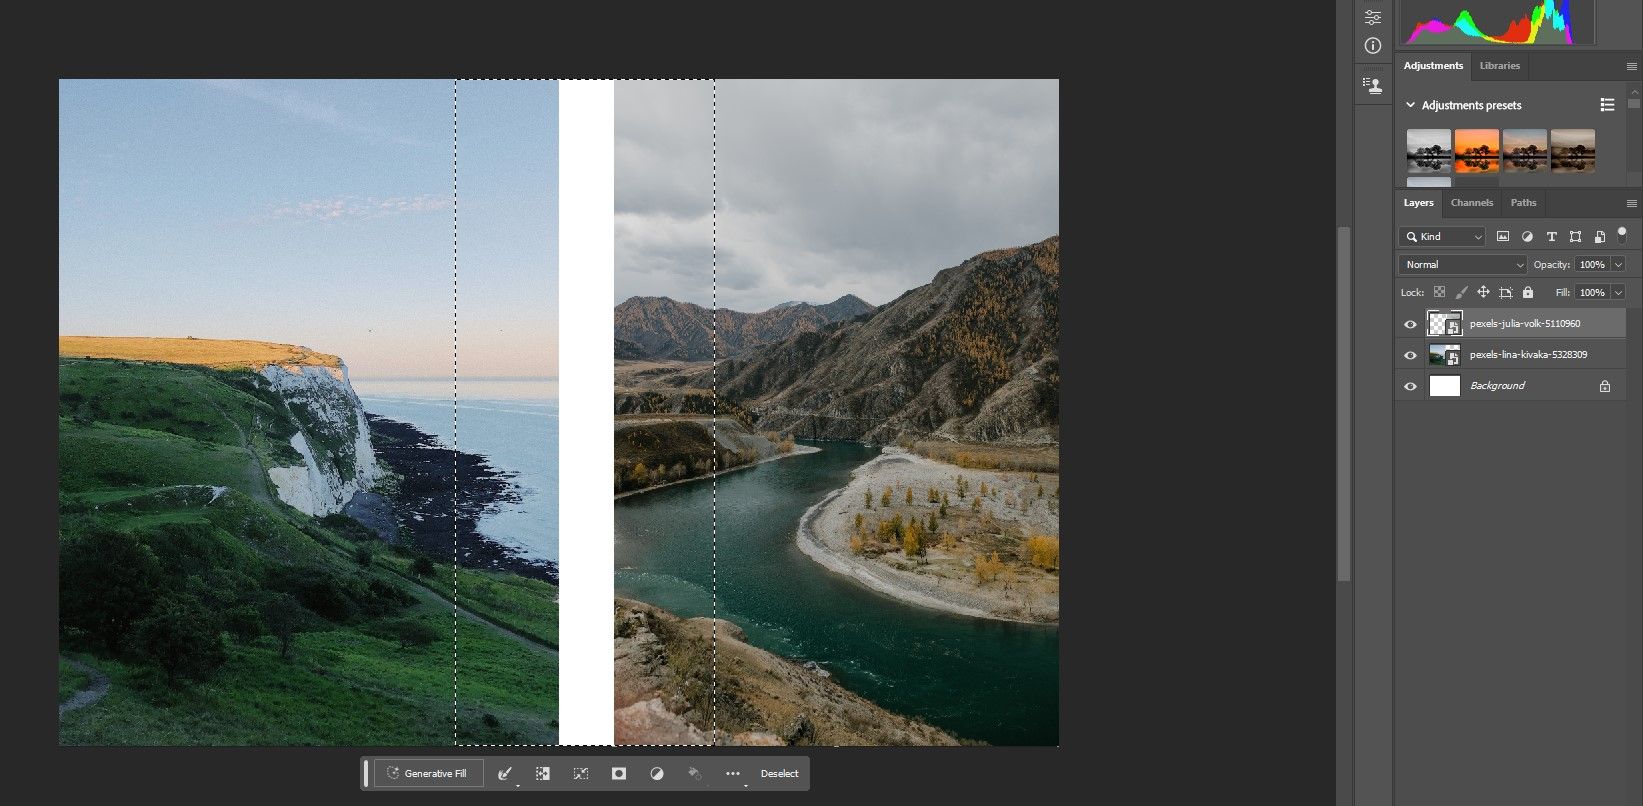
After selecting the two images you wish to merge on your computer, create a new document in Photoshop Beta, which will act as the canvas. Next, position each image within the document, ensuring there's ample space in the center to facilitate the creation of a transition with Generative Fill in the next step. Lastly, use the Rectangular Marquee tool to select the empty spaces as well as a portion of both images.
Here's how to do it:
- Go to File > New in Photoshop Beta or press Ctrl + N.
- Change the Width and Height to 6,000 and 4,000 pixels respectively, or to the dimensions of your choice. Then click OK.
- Go to File > Place Embedded and choose an image file for placement. Repeat this step for both images.
- Align both images on the left and right, leaving a gap in the middle as shown below.
- Click on the Rectangular Marquee tool icon or press M for the keyboard shortcut.
- Place a rectangle that covers the middle of the image, making sure that it overlaps quite a bit with both images.
Keep in mind that you can use any of the selection tools for marking the pixels you want to use with Generative Fill. You also don't have to place the selections in the middle of the image. The goal is to select a sufficient portion of each image for the AI computations and, ideally, to choose the pixels you wish to be altered when the two images are merged.
Combine the Photos Using Generative Fill
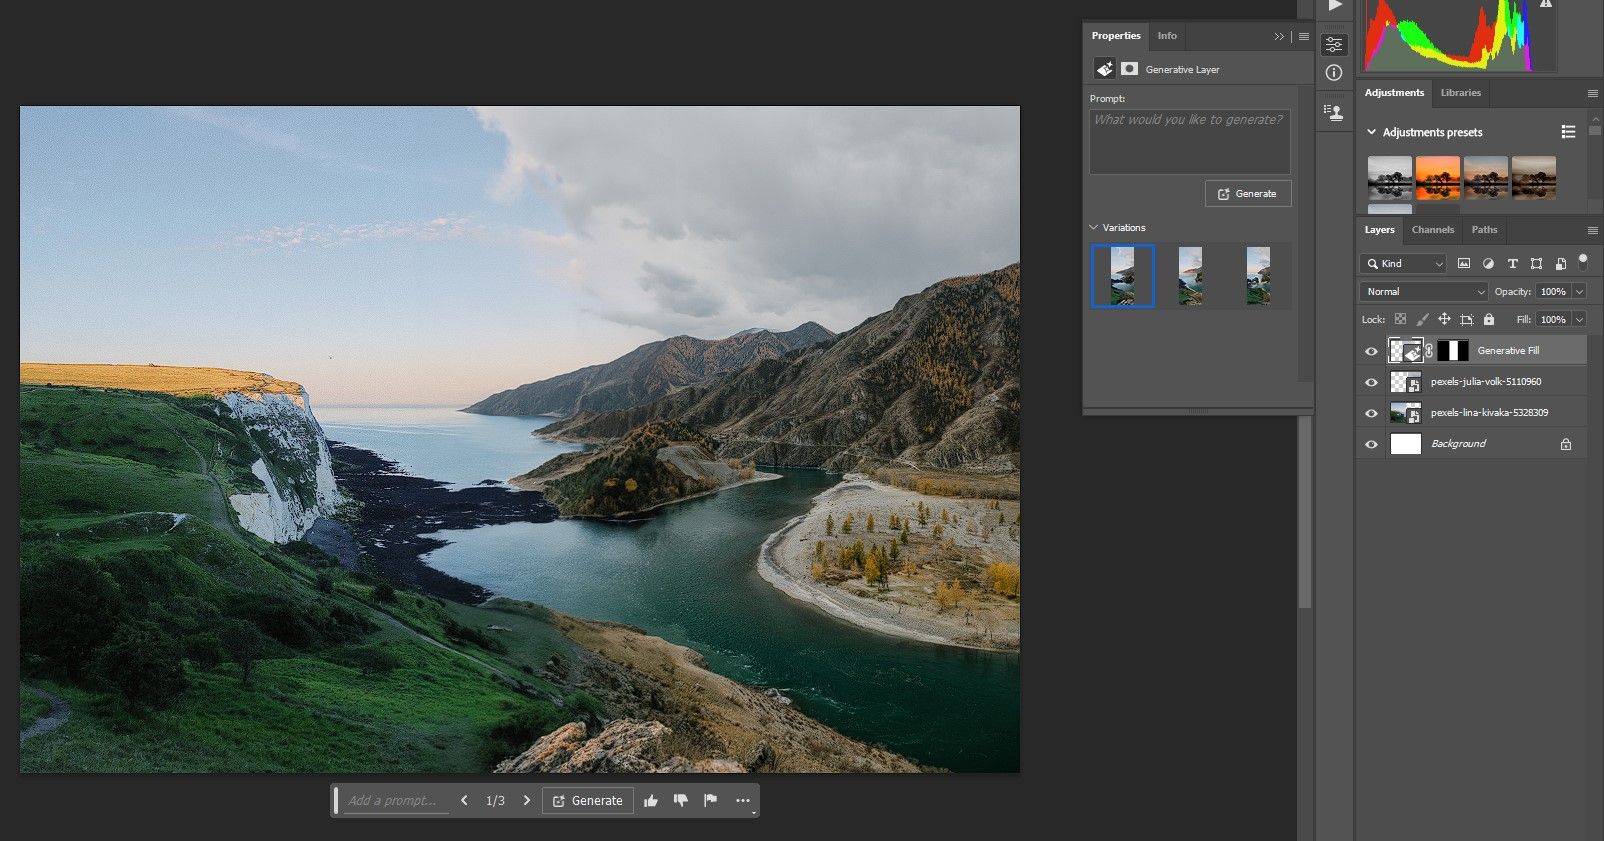
Generative Fill is extremely easy to use in Photoshop Beta. With the selection made after following the steps above, all you have to do is click on Generative Fill and then click on Generate. You can leave the prompt (text field) blank.
Here's how to do it:
- Click Generative Fill.
- Click Generate.
- Of the three choices under Variations, select the best one. If you're not happy with any of them, click Generate again until you find the perfect one.
Once you have chosen your favorite variation, it's time to move on and make a few adjustments to create a realistic composite. Besides composites, there are other awesome things you can do with Generative Fill to improve your photos.
Make Adjustments to Seamlessly Blend the Images Together
There are many different ways to edit composites so that all the elements blend together and look natural. We'll use three tools to do this for our example, but this workflow would work for many other kinds of composites too.
We'll use Hue/Saturation and Curves adjustments along with the Sky Replacement feature to help make these two very different-looking landscapes blend together seamlessly.
Here's how to do it:
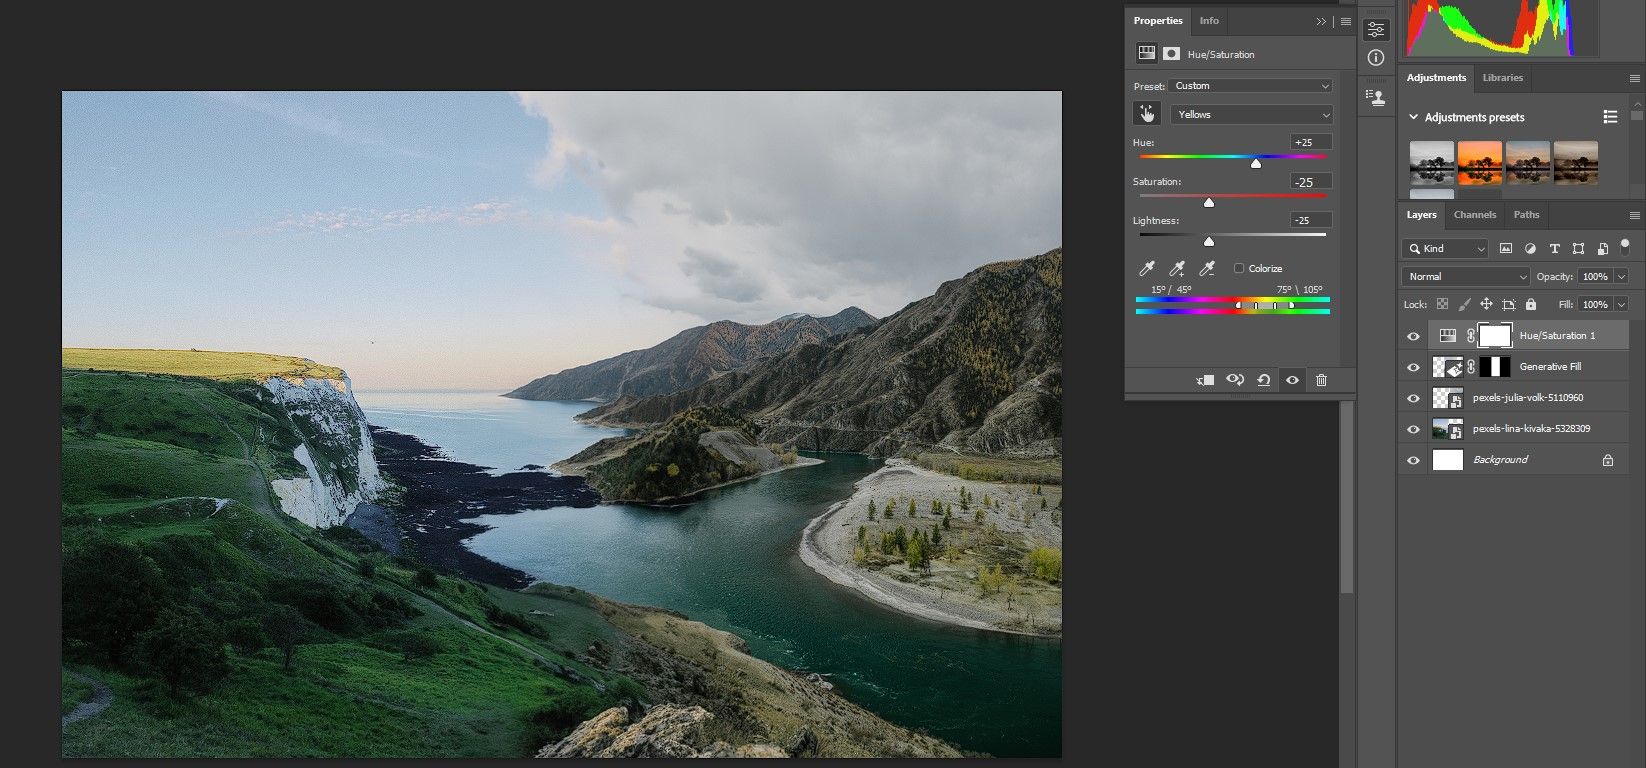
- Create a Hue/Saturation adjustment layer.
- Determine the dominant color in the landscape (excluding the skies). Then use the Color Picker tool (hand icon in the Properties menu) to figure out which one or two dominant colors can be changed via the Hue slider to blend the images together.
- In our example, we clicked on the trees on the right side of the image and changed the Hue to +25. Then we changed the Saturation and Lightness sliders to -25 each to match the darker tones of the image. You'll have to play around with these settings depending on your image.
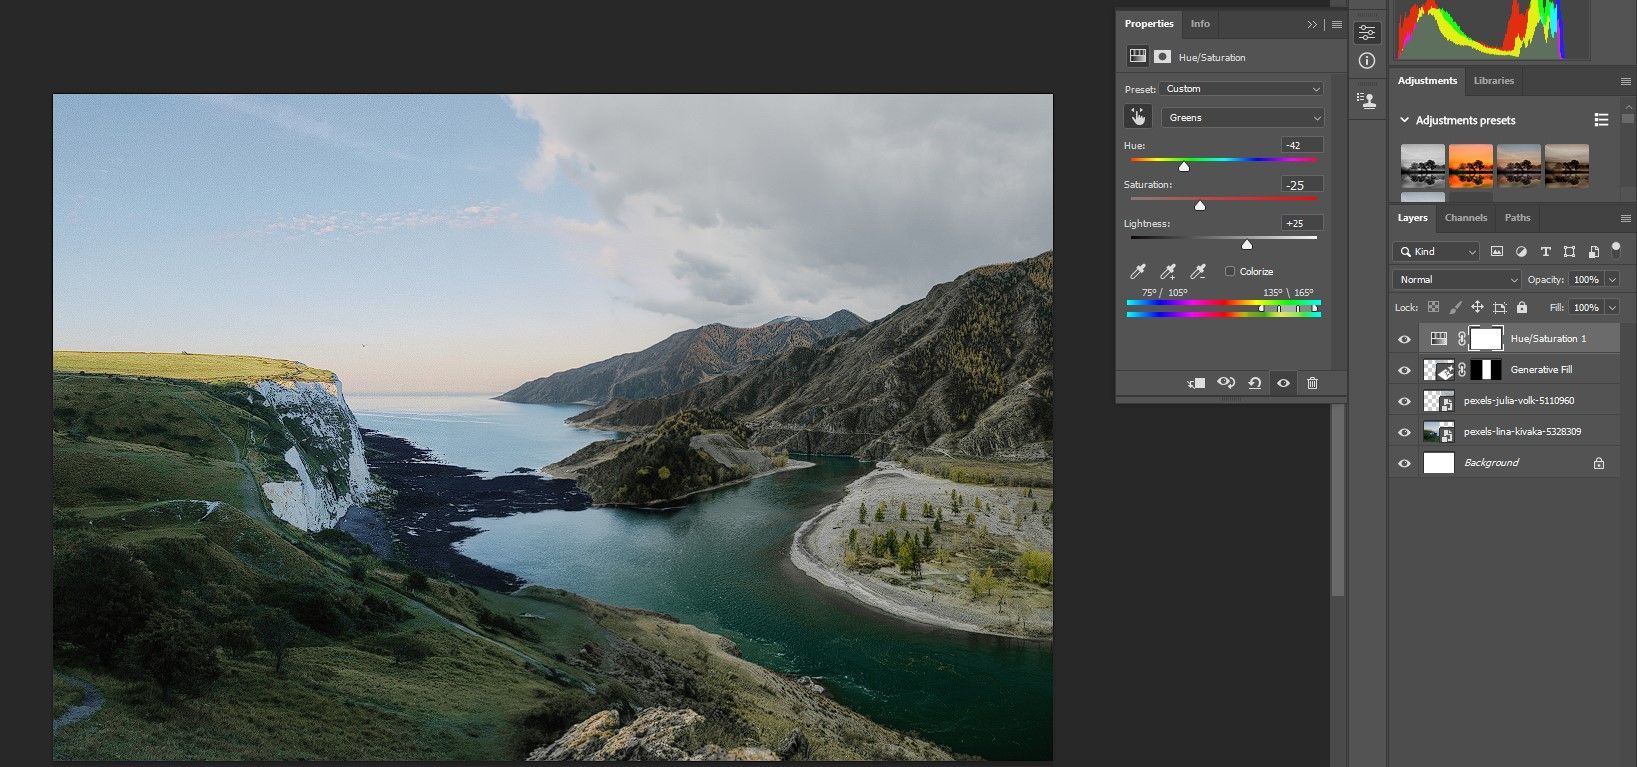
- For this image, the greens are also dominant. So we chose Greens from the dropdown menu and adjusted the Hue, Saturation, and Lightness sliders again to desaturate the hillside on the left. Adjust as necessary for your particular image.
- With the top layer selected, press and hold Shift + Ctrl + Alt + E to create a Stamp Visible layer on top.
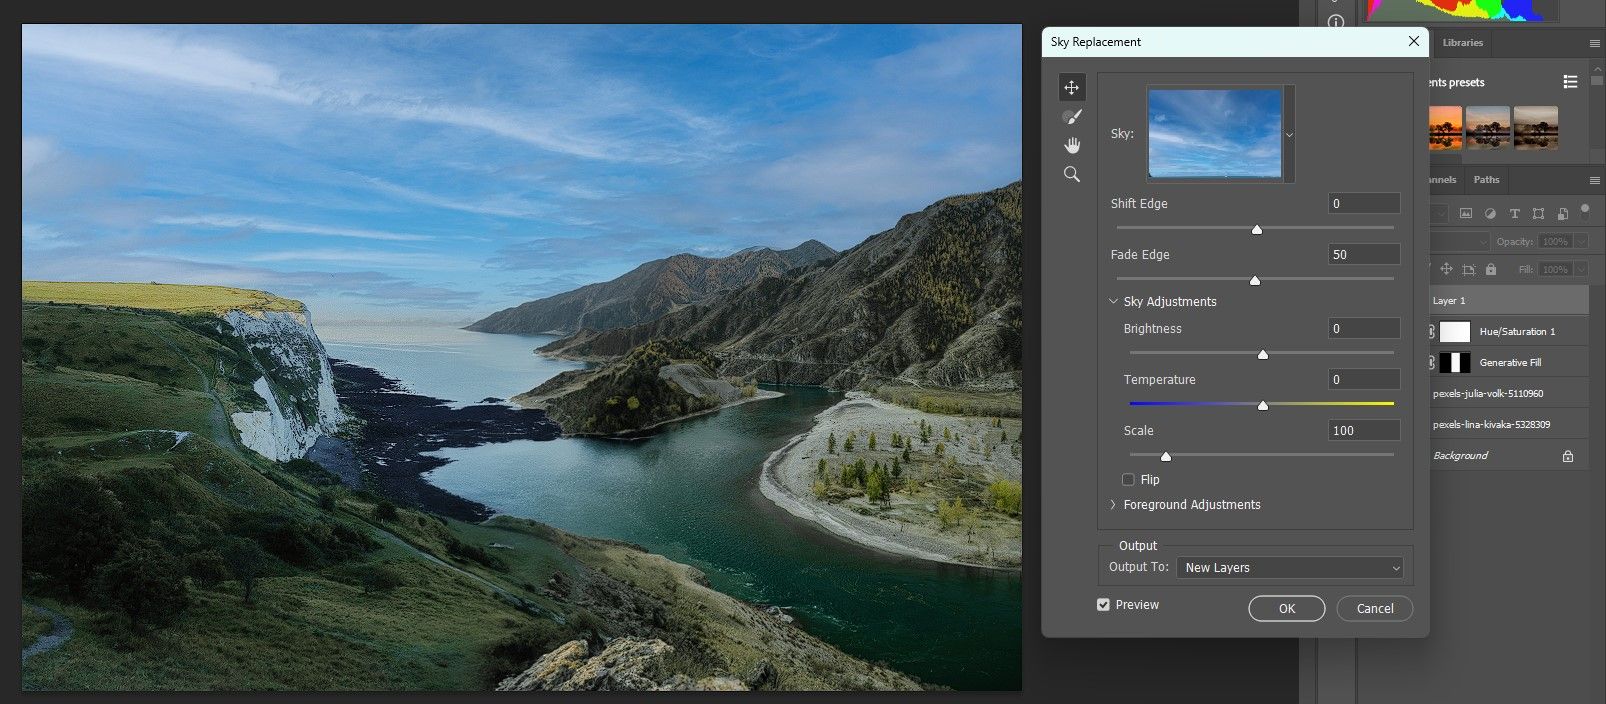
- Go to Edit > Sky Replacement.
- Choose one of the skies in the dropdown menu that suits your image.
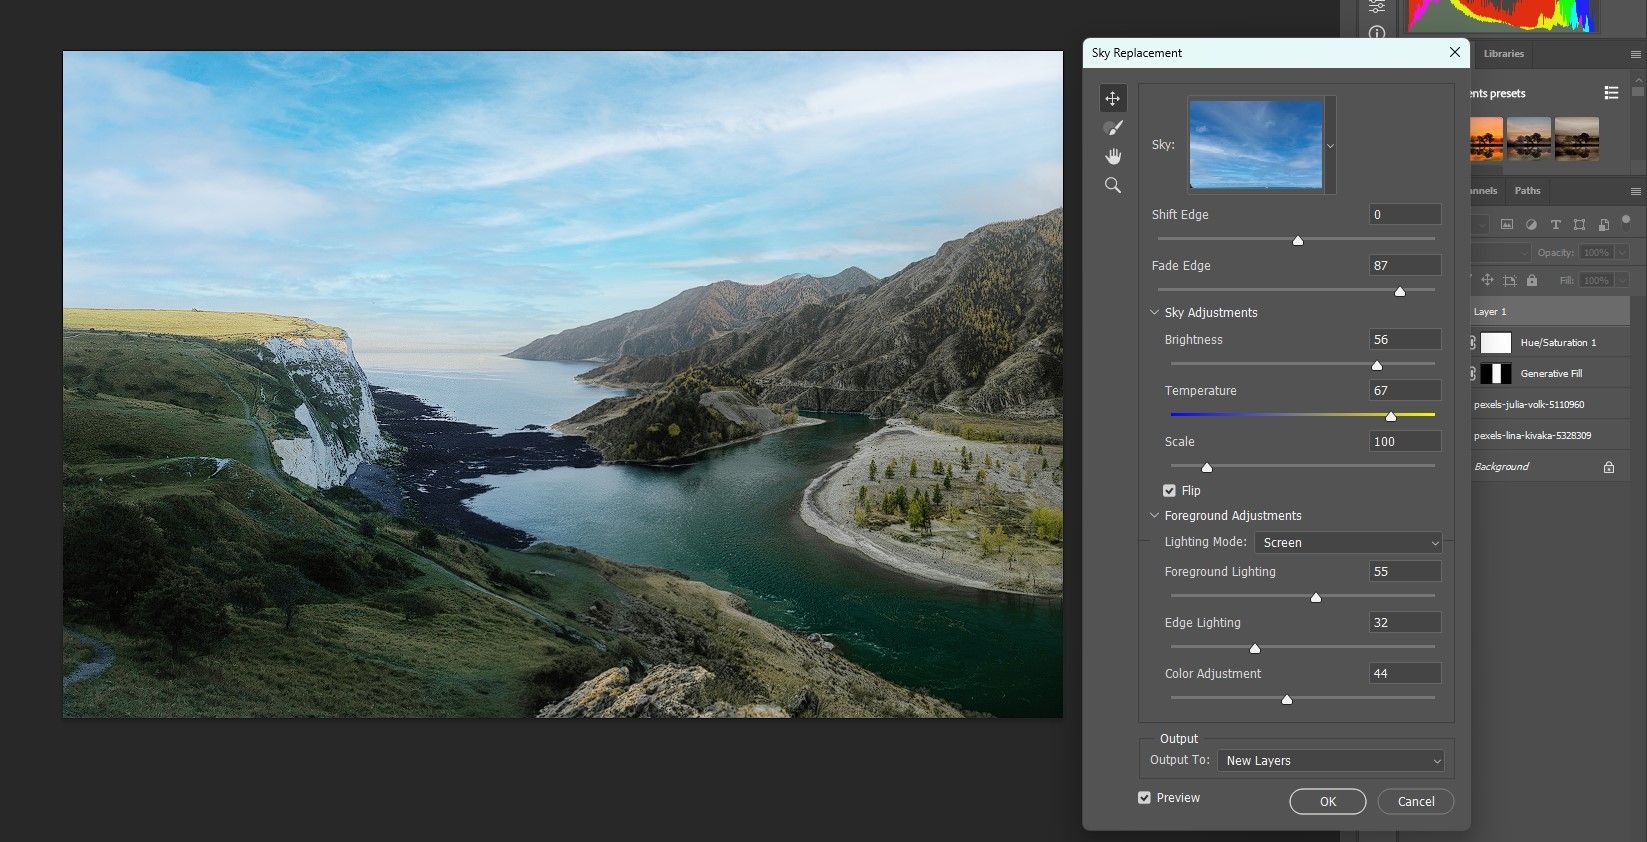
- Experiment with all the sliders to blend the sky in realistically. Make sure to try flipping the sky (check the Flip box). Also try the two dropdown options in Lighting Mode so that you've explored all your options. Then click OK.
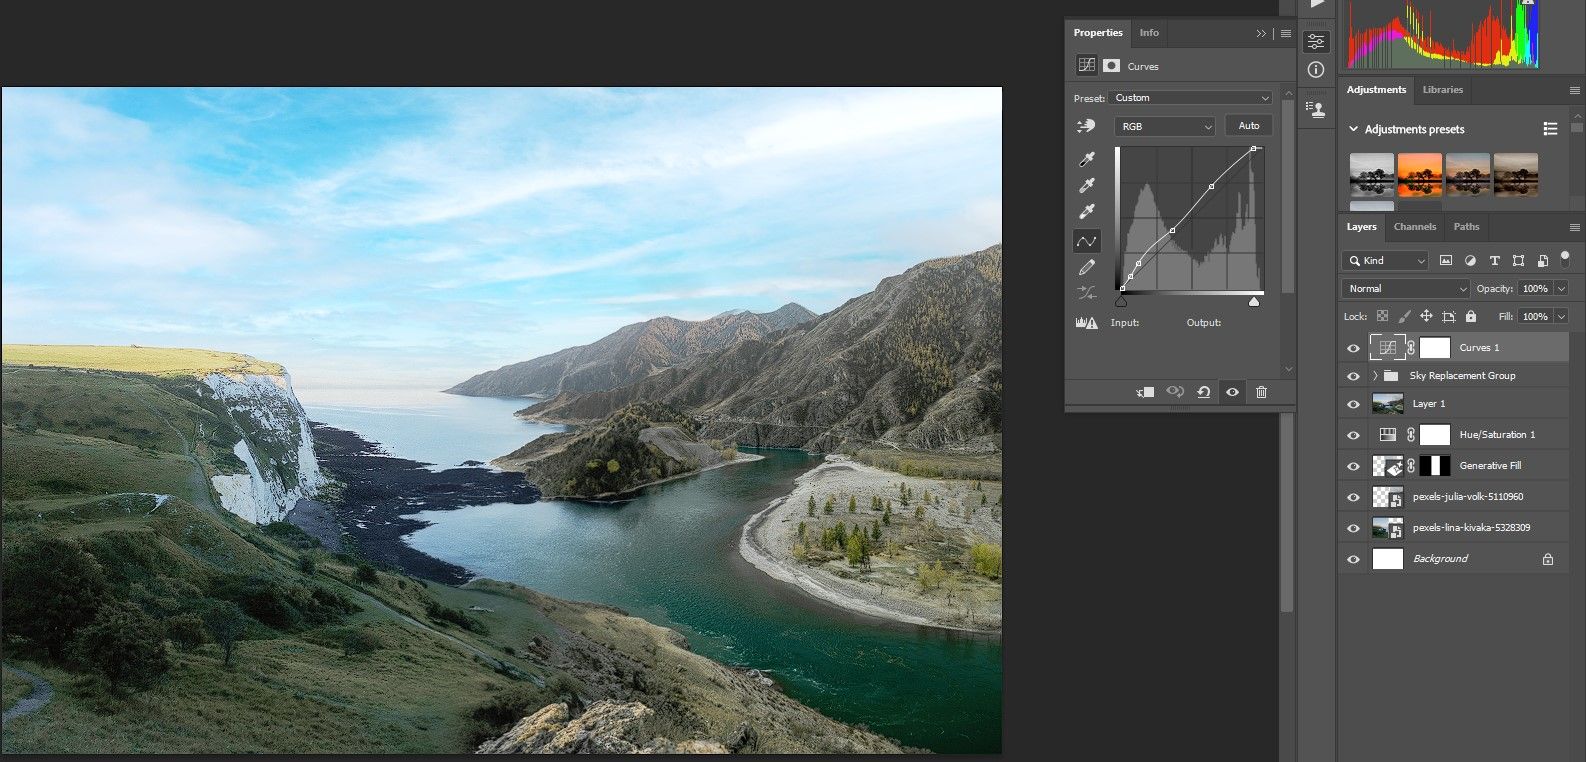
- With the Sky Replacement Group layer selected, create a Curves adjustment layer and adjust the exposure values. For our example image, we brightened the foreground.
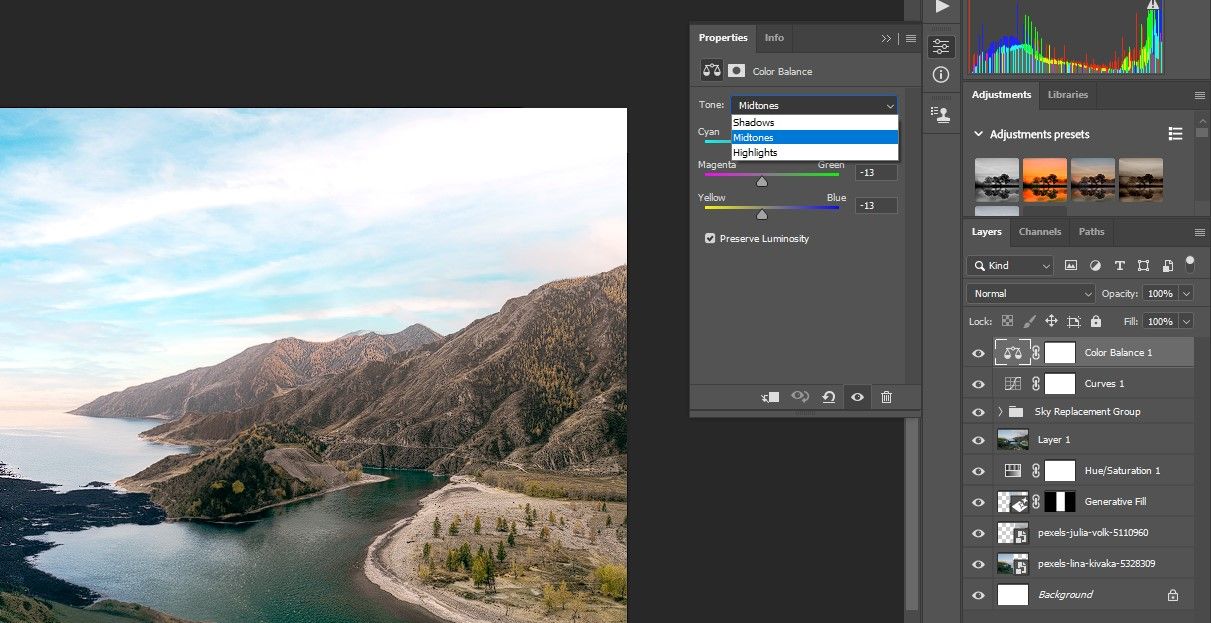
- With the Curves layer active, create a Color Balance adjustment layer. Experiment with the Shadows, Midtones, and Highlights to correct the color of the entire image.
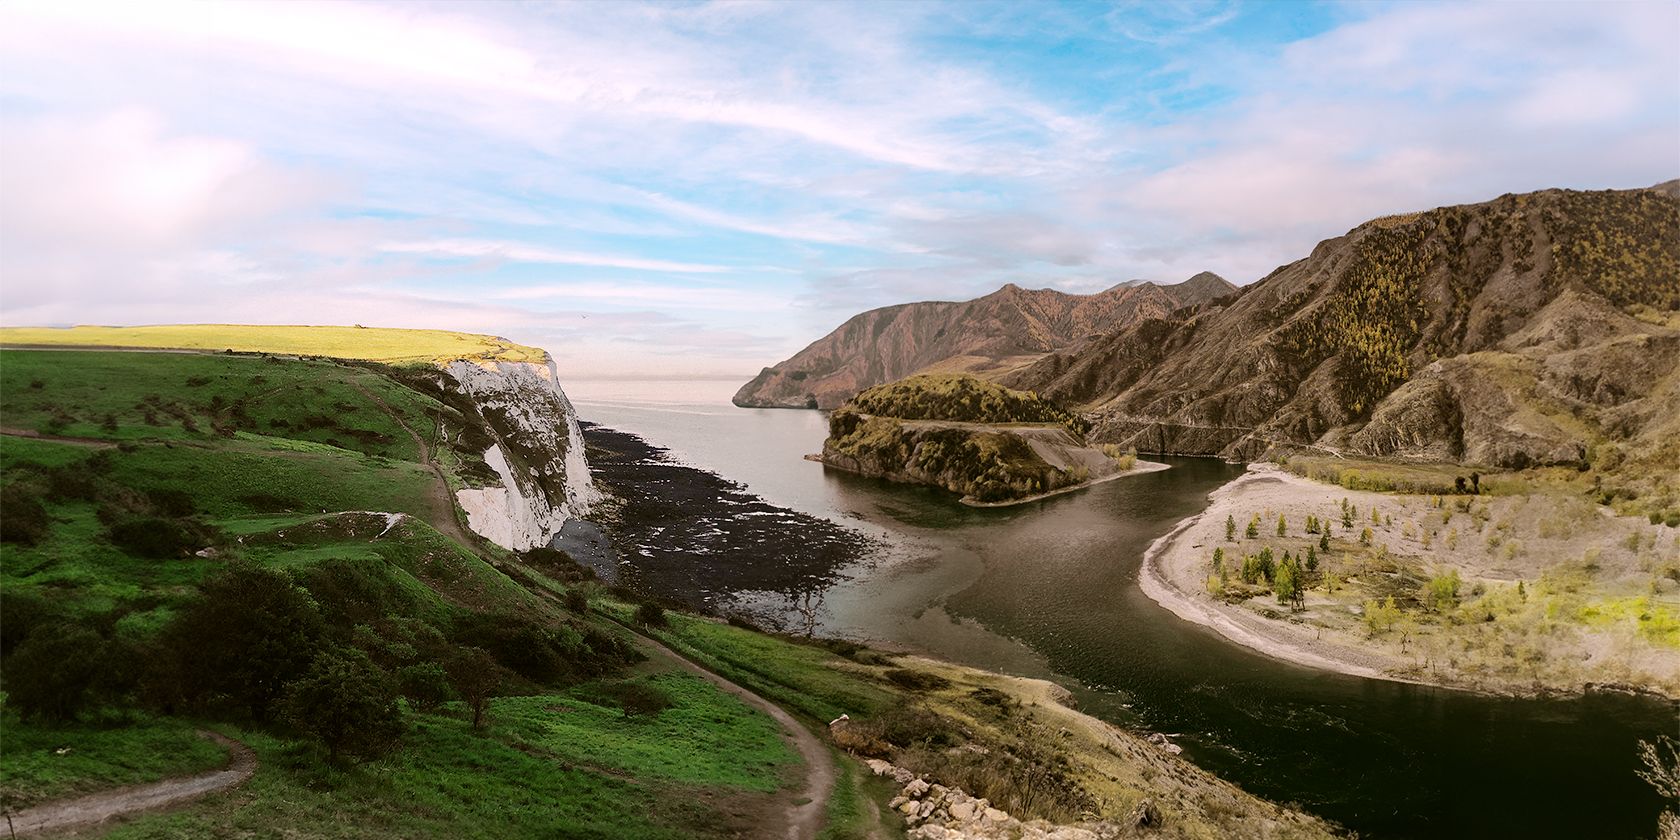
If you like the challenge of compositing very different images together, this is one thing that Generative Fill does very well.
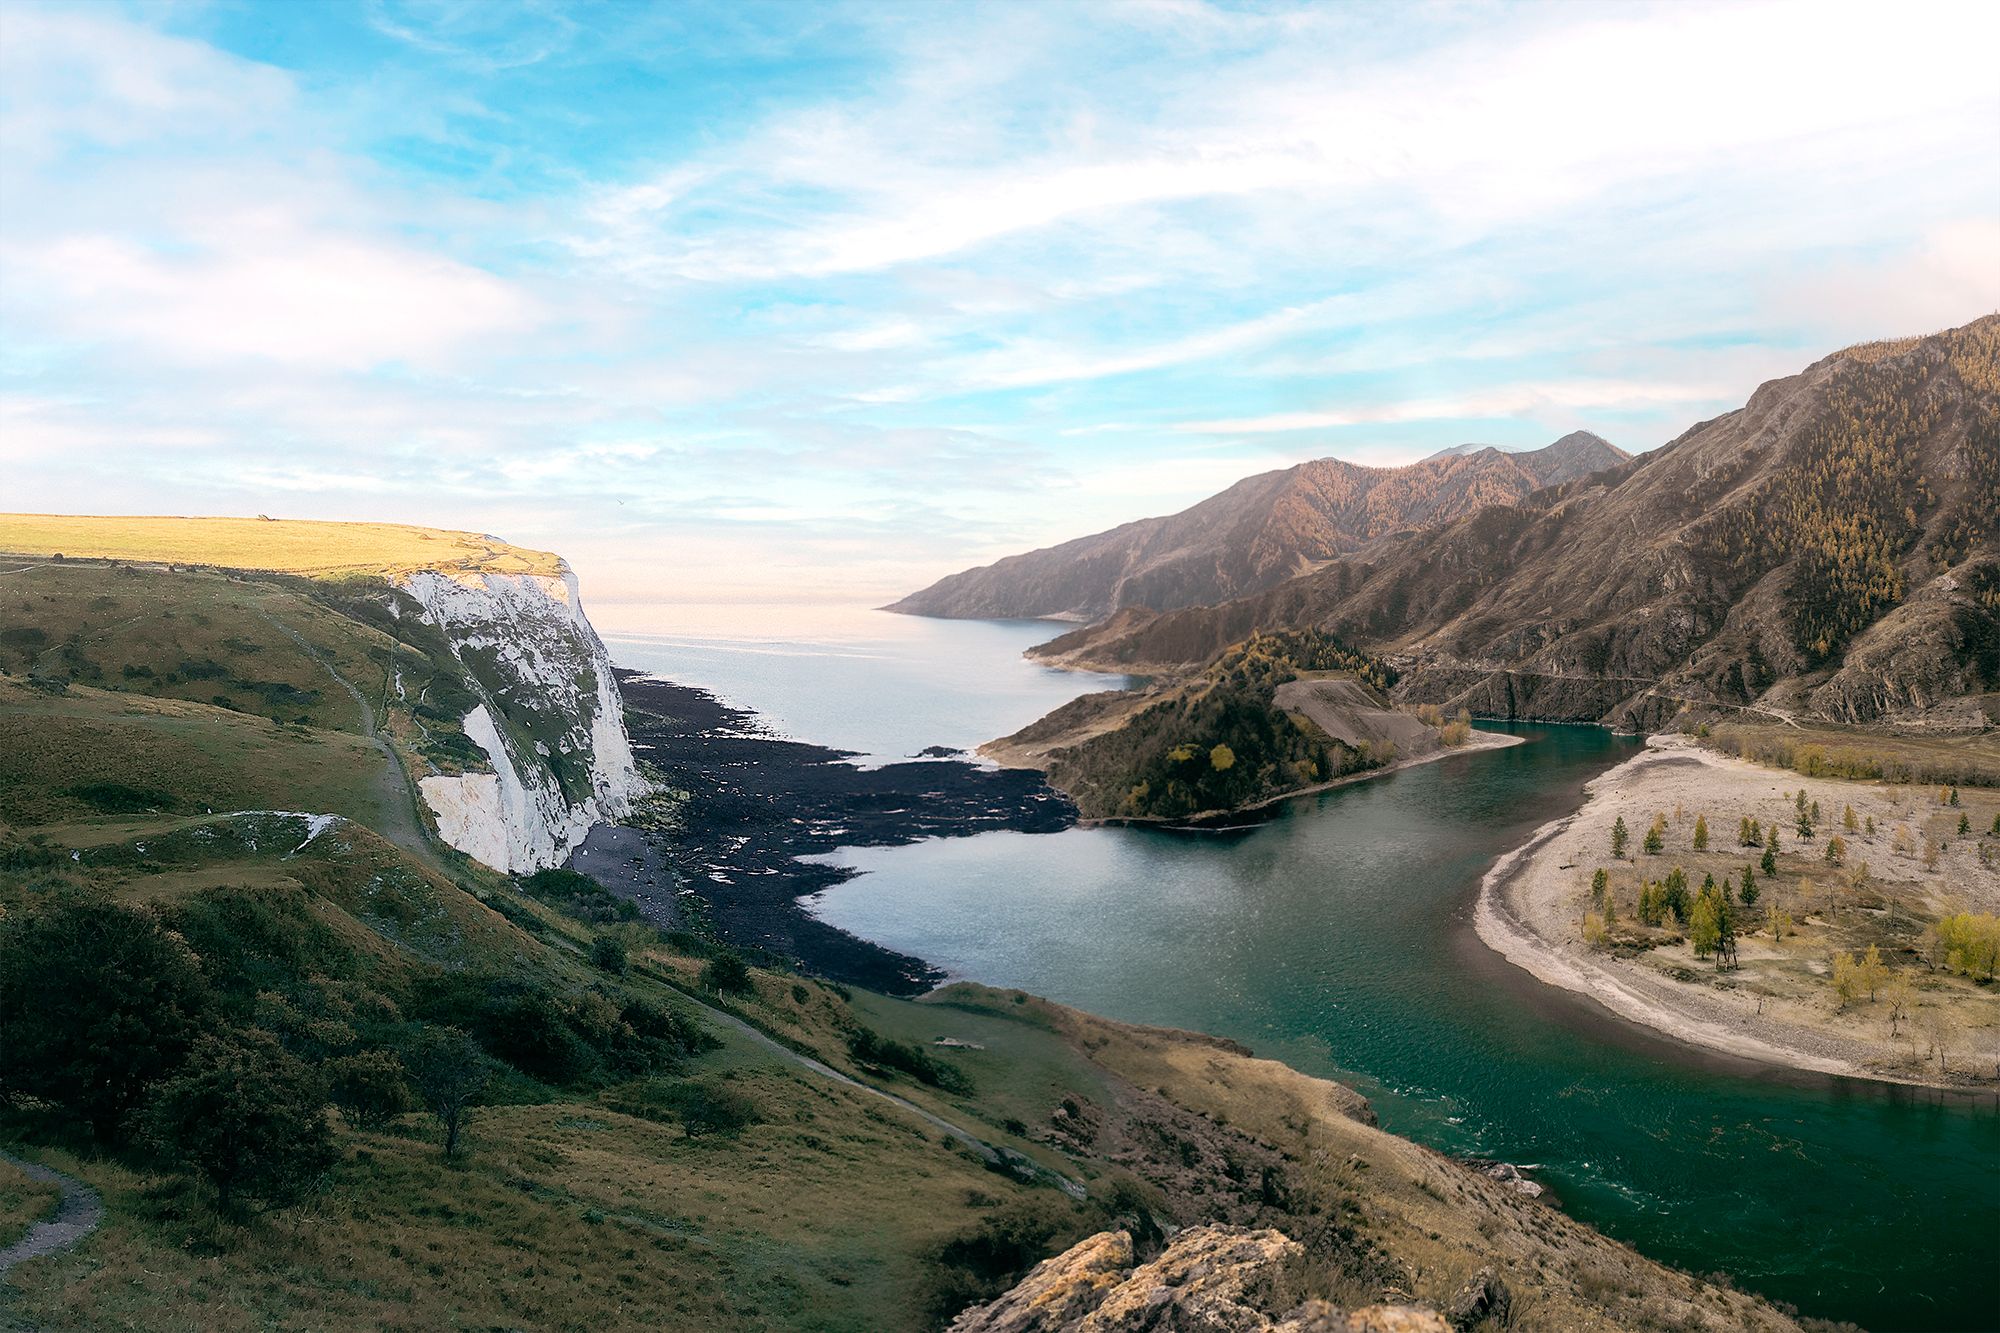
Here is our final result:
When you're happy with your image, you can also use Generative Fill to turn your photo into a work of art.
Compositing Made Easy With Generative Fill
The magic of Generative Fill is that you can combine two or more very dissimilar images and create a compelling composite. The key is in placing the images within the canvas and selecting enough of the pixels to create a smooth transition. Give it a try with your own photos and see what new creations you can come up with.

