Kindle eReaders are constantly improving with regular software updates. These updates are essential as they come with performance and security upgrades, bug fixes, and new features.
By default, your Kindle should automatically search for and install updates almost as soon as they come, but you can also do it manually. Here’s how to update your Kindle to ensure it functions optimally.
Does Your Kindle Need Updating?
The Kindle’s firmware is designed to automatically update when connected to Wi-Fi. In fact, your device will automatically update your Kindle books whenever it is connected to the internet. Regarding software updates, your Kindle will regularly check with Amazon’s servers for updates, download and install them.
So, most of the time, you don’t have to worry about updating your Kindle. But sometimes your Kindle may not update automatically. If you want to get more out of your Kindle, you'll need to learn how to update it yourself.
How to Update Your Kindle
The simplest way to update your Kindle is with the Device Settings. Let's take a look at how to do so:
- Connect your Kindle to the Internet.
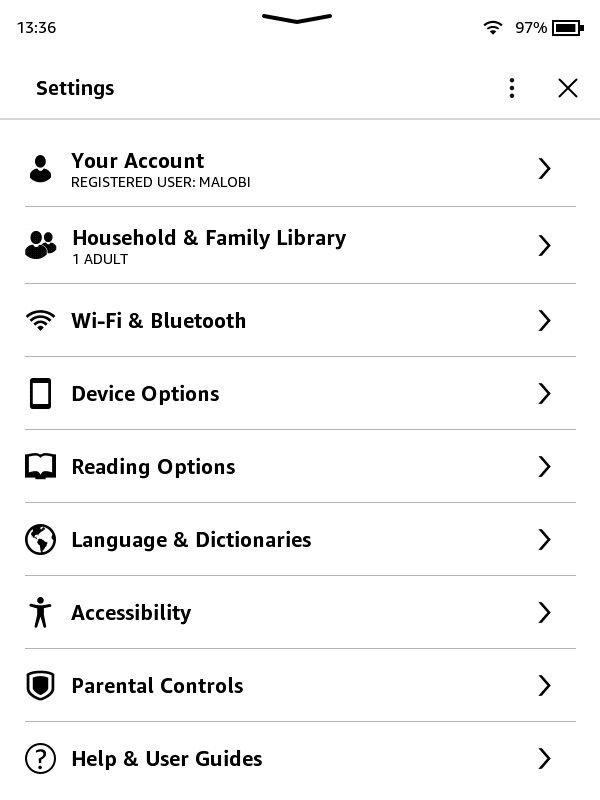
- On the Kindle Home Page, Tap the three-dot button in the top-right corner. Then, tap Settings from the drop-down menu.
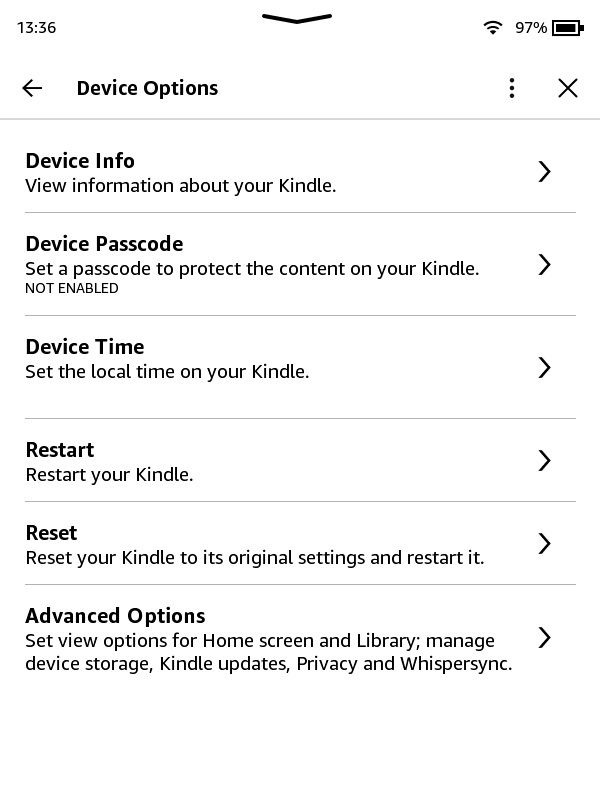
- In the Kindle settings, tap Device Options.
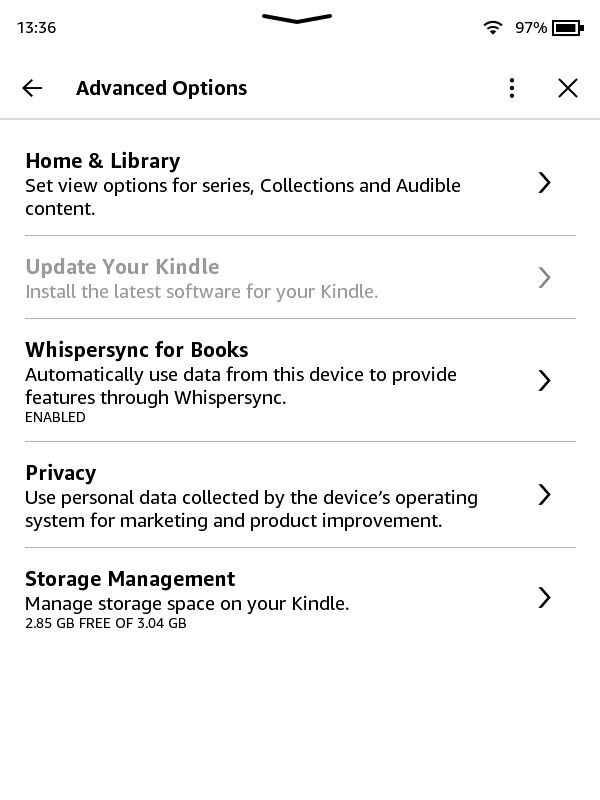
- Tap Advanced Options, and select Update Your Kindle.
Your Kindle should now download and install the latest software update.

How to Manually Update Your Kindle
Sometimes, following the steps above might not work, either because the "Update Your Kindle" option is grayed out or because your Kindle model may not support the standard update process. When this happens, you will need to update your Kindle manually. Here's how:
Step 1: Identify Your Kindle Model
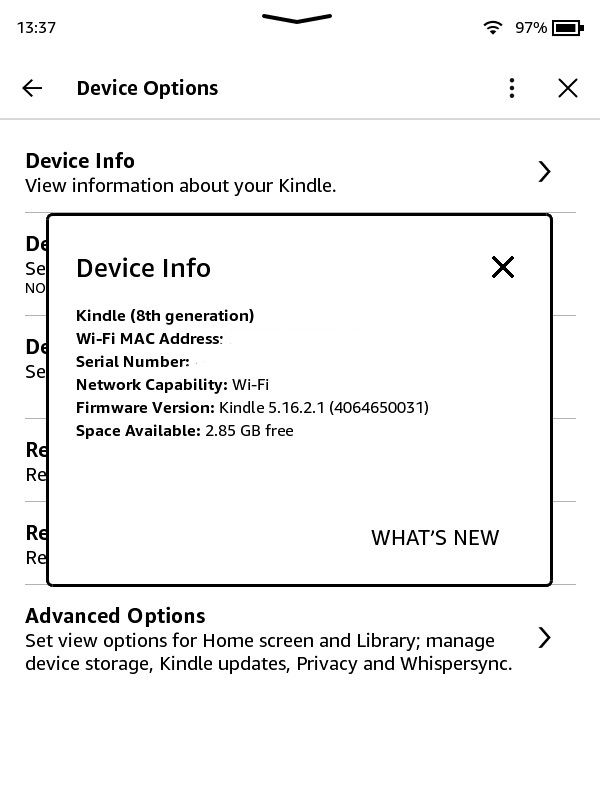
To manually update your Kindle, you will first need to find out your Kindle model to download the correct software version. Go to Settings > Device Option > Device Info. Here, you can find your Kindle model, generation, and current firmware version.


Step 2: Download the Latest Firmware Version for Your Kindle
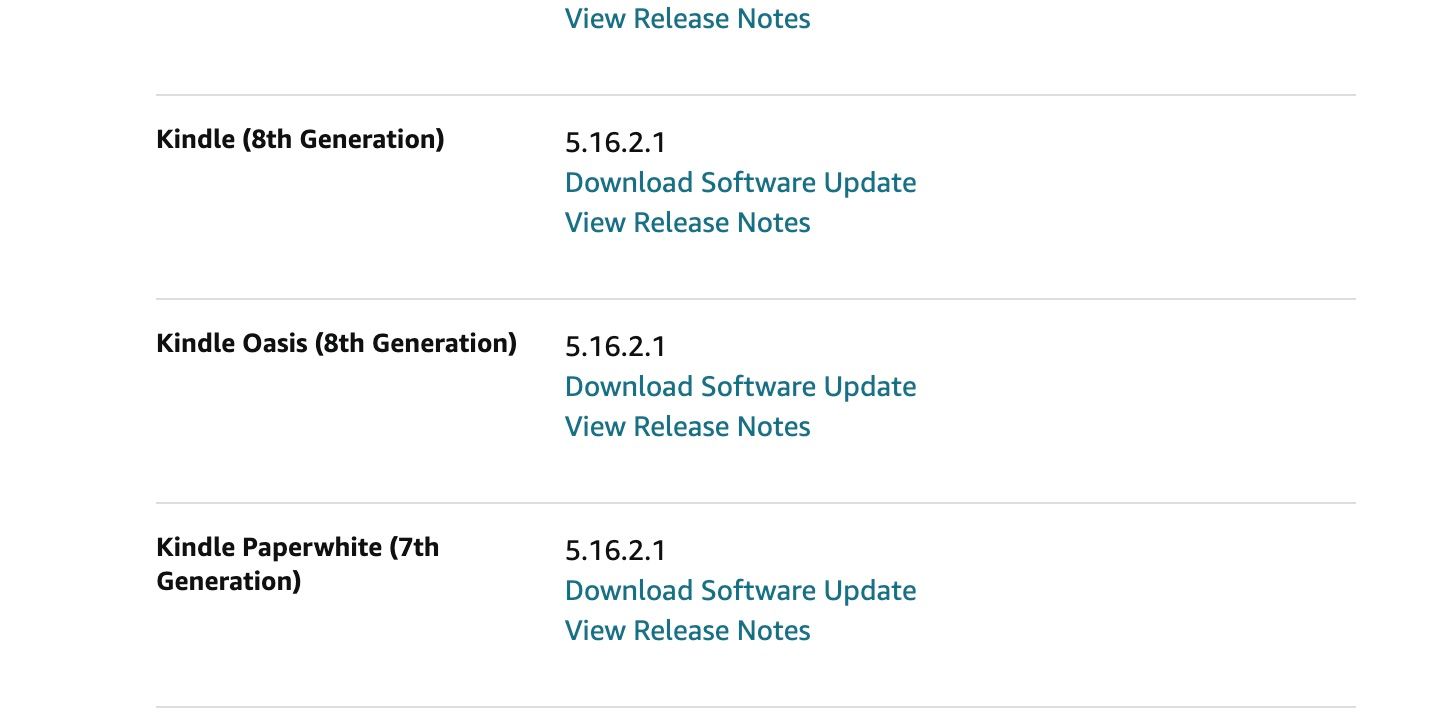
Once you’ve identified your Kindle model, download the latest firmware update for your Kindle. You can find the complete list of the latest Kindle firmware updates on Amazon's website.
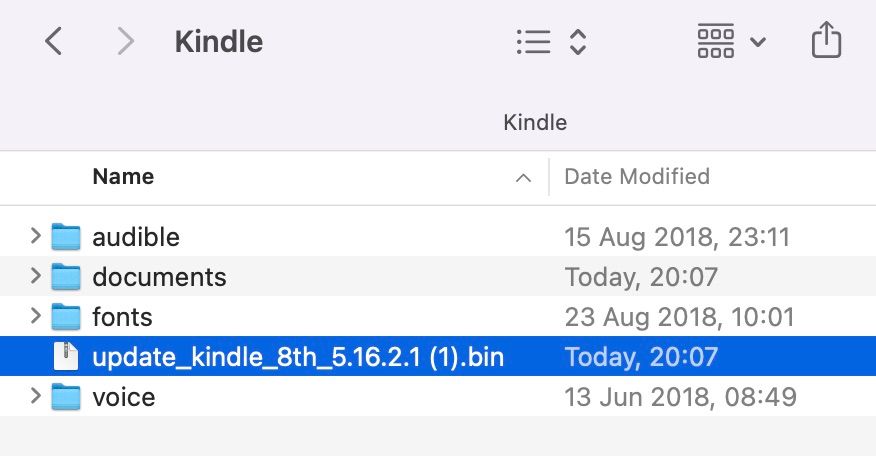
Locate your Kindle model on the list and click Download Software Update. Once the download is complete, a BIN File should appear in your Downloads folder.
Connect your Kindle to your computer using a USB cable. Your Kindle should show that it is in USB Drive Mode. Then locate the Kindle drive on your computer.
Transfer the downloaded file to your Kindle. Make sure you don’t transfer it to any folder in the drive. You can then safely eject your Kindle from your computer.
Step 3: Install the Software Update
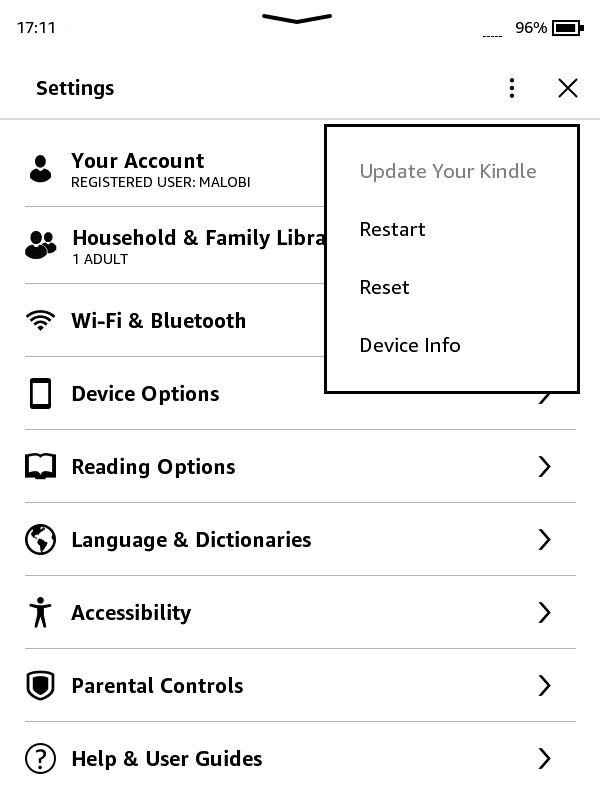
To install the update you just transferred, head to your Kindle Settings. Then, tap the three-dot button on the top-right, and select Update Your Kindle.


What to Do if the Option to Update Your Kindle Is Grayed Out
Sometimes, when you try to update your Kindle, the option to do so might be grayed out. This may happen if your Kindle is not connected to the internet or if your Kindle software is already up to date.
To solve this, you will need to update your Kindle manually by using the steps provided above.
Stay on Top of Kindle Updates
Software updates are essential as they keep your Kindle functioning optimally, improve your reading experience and introduce new features. So ensure you keep your Kindle up to date. Remember to keep your Kindle charged and connected to the internet throughout the process.


